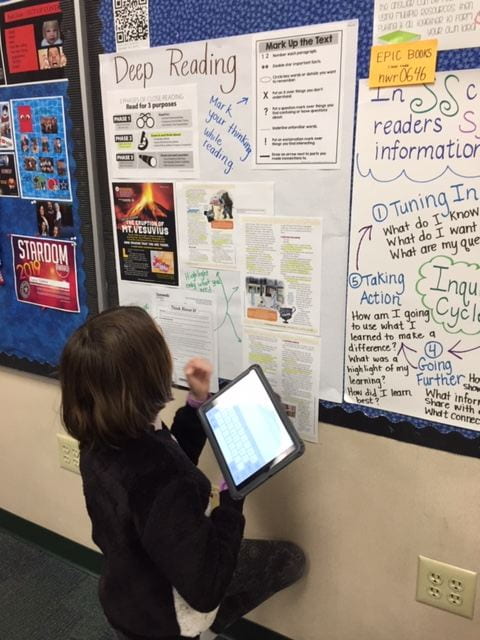
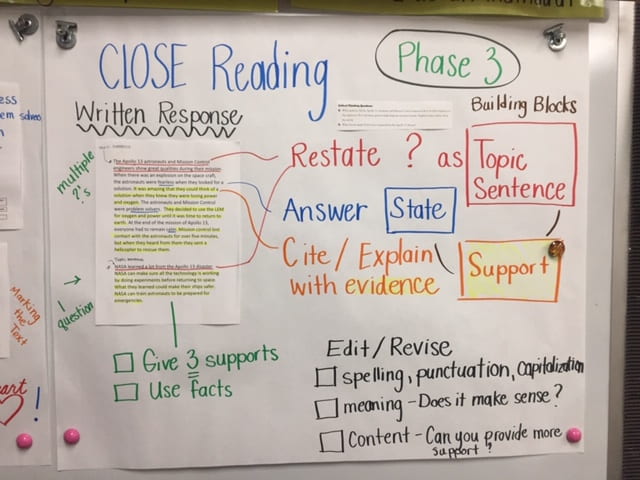
Take your anchor charts to the next level! A typical anchor chart provided by a teacher serves as a reference to steps or key ideas with a standard being taught. However, what if a documentation approach is used to anchor the next steps students will take on their own? Educators know the power of “I do” modeling. Then we guide students to a “We do” stage. In the end, we desire students to apply a skill on their own in the “You Do” stage. What would happen if the teacher captures these phases of instruction in the classroom and adds this to the anchor charts in the room?
Capturing the Process in Visual Documentation

Teachers begin gradual release with the modeling process and the thinking a learner uses with a particular skill. Capture the “I Do” modeling and create an anchor chart that displays the learning steps. The modeling you do for students could be recorded and a QR code to the video link can be printed and added to the anchor chart. A teacher-created product helps students see what the skill looks like. Teachers can recap their steps on an anchor chart that can be created after a lesson. This anchor chart can serve as a reteaching tool at the start of the next lesson.
The next phase of modeling is done with the students providing input on the skill being taught. It is the “We Do” phase of learning. After this phase, develop a second anchor chart that shows the process done during “We Do” and also displays tools that students can use while practicing the skills. Often students add tools to a notebook or have it available in a folder to support the skill with tips. A QR link to a recorded mini-lesson could also be added to this anchor chart. Both charts can be used to revisit the process of learning a skill before a student is released to try it alone. The second anchor chart serves to reduce the difficulty of the task being taught by breaking it down into a manageable learning chunk for students to prepare to do independently.
Follow up with a third chart that displays a checklist, a breakdown of steps, and a student model of the skill used for students to access while in the “You Do” phase of learning. Also, let’s push beyond just posting “I Can” statements to using a “What, Why, and How” approach. The anchor chart that displays what, why, and how allows the educator to display the learning criteria, purpose for learning, and what success looks like when the learning task is accomplished. When learning is visible for students it can be more easily accessed and replicated by students. Let’s really anchor the learning! On this chart, a teacher can add student models for students to see a finished attempt or product. A rubric can be added to this chart as well.
What developed in my classroom was the need to document the three phases from the modeling! Yes, it was becoming obvious that going beyond the “anchor” chart was necessary so that our process lived in the room. What transpired was an improvement in my visual support for learning! In this presentation, you can follow the process through visuals of anchor charts, learn technology tools, hear me share my process through video, and learn about the connection to Universal Design for Learning, UDL Guidelines. Students were assisted with anchor charts that supported the thinking process which led to better independent success.
Students were assisted with anchor charts that supported the thinking process which led to better independent success.
One Last Glance
Take a look at your current anchor charts. What documentation is available for students? Do the visuals provide scaffolding support? Can a student easily revisit previous learning? What small change can you make as a teacher to improve your visual representation of learning in the classroom?
Tips for Taking this Small Move
- Keep your traditional anchor chart. You don’t have to get rid of the beautiful anchor charts you already have-just add to them.
- Find a way to record a video of the mini-lesson. Link the video to a QR code. Add the QR to your anchor chart for review.
- Use the documentation to review the lesson from the day before. The learning is visible and easy to revisit. Could a student use the anchor chart from yesterday to review with the class? Could students view the chart and “brain dump” everything they remember from the teacher modeling on a piece of paper or with a partner?
- Allow students to approach your documentation during the “You Do” phase of learning. Observe which students use the visuals. What did the students find useful?
- Add the tools you are providing students with to the anchor chart. The tool will remind students of what they can use to help work on a skill.
- Add checklists to charts when it makes sense for the skill. The checklist can serve as a way to self-reflect.
- A rubric could be added to an anchor chart. Could students use the anchor chart to self-score with a learning partner before submitting work?
- Make the learning of a skill visible more than just during the introduction of a skill by adding what, why, and how to a unit anchor chart.
- Can students use visuals to explain what they are learning? If someone else entered the room, could students use the chart to explain the standards they are working on?
- Can students make personal learning goals due to the documentation charts in the classroom? Could their goals be written on Post-It notes that are added around the chart?
- Remember that your anchor charts can lead to reflection. You can prompt, “Using the anchor chart, what are we learning and how are we showing our learning today?”


