So you’ve purchased a 3D printer. Now what? Over the next three months, we’ll be looking at ways to get your 3D printing program off the ground and keep it sustainable. In this first installment, we’ll be looking at three clarifying questions to help you make informed decisions about your program.
Clarifying Questions
To build a sustainable, effective printing program, you’ll want to clarify three key questions:
1. What’s Your Why?
2. Who’s Your Who?
3. What’s Your How?
These questions will help you organize your program, create a functional budget, maintain structures and processes, and ensure a successful launch.
What’s Your Why?
Whether you’ve already purchased the 3D printers or you are just shopping around, pause for a bit and reflect on why you want to bring 3D printing to your students. Brainstorm your goals and vision for your program. As you make choices, keep your “why” in mind. Here are a few common “why’s” to help direct your thinking.
- 3D printing is a skill that is now ubiquitous across industries. It’s best known for its role in manufacturing, especially for quick prototyping. But it’s also common in medicine, aerospace, engineering, and automotive, just to name a few.
- 3D printing, or additive manufacturing, is a job skill students will likely need in their future careers.
- The design skills needed to build models using CAD programs requires real-world problem solving and creativity.
- 3D printing is cross-curricular. Math skills, reasoning, and collaboration are all benefits of a 3D printing program.
- These skills also meet state and national standards. The Engineering Design Process is a Disciplinary Core Idea in the Next Generation Science Standards. Collaboration and creativity are skills intertwined throughout the ISTE standards.
Who’s Your Who?
Now that you have a purpose and direction, it’s time to think about who you want to impact with your printers. The obvious answer is students, but is that actually true in your situation? Other possibilities include:
- Staff and faculty at your building
- Staff and faculty across your district
- Community members
- Other organizations
Once you know who you are trying to reach, you’ll have a better grasp of what to do next with your program. Part of that process will involve thinking through routines and guidelines for using your printer. Who will have access? How will they access your printer? When will you offer access? If you don’t set these things up ahead of time, your program will be difficult to manage and sustain.
What’s Your How?
How will you organize the physical space for maximum efficiency? How will you schedule the use of your printers? How will you get files to your printer? And how will you distribute models once they are printed? Each of these questions should be carefully considered when designing your 3D printing program.
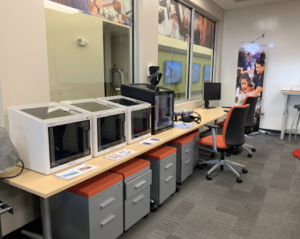
Organizing Your Space
When organizing your physical space, you’ll want to consider:
- Number of outlets
- Availability of extension cords and power strips
- Access to wifi
- Table or counter space, including clearance for opening and closing doors
- Access to windows or ventilation systems

Consider your instructional space. Do you want your 3D printers front and center where students are watching and listening throughout the day? This may be too distracting for some students. Instead, consider placing your printers in the corner or back of your space. Also, consider the noise level of your printer. Most 3D printers operate between 30 and 65 decibels, but the louder models could prove distracting in some environments. Another consideration is ventilation, especially for certain filament types, such as ABS. Some printers come built in with filtration systems, such as HEPA filters. Alternatively, placing 3D printers near windows or in ventilation hoods can help prevent odors. Check your manufacturer’s recommendations for ventilation requirements. Finally, keep your why and who in mind when organizing your space. If your goal is maximum student interaction, you’ll want to make sure there is open and easy access. If you are a resource for others, you’ll want to consider safety and security.
Scheduling Your Space
Even if you are primarily wanting to use your printers with students, you will likely be asked to print for other teachers, or other teachers will ask if they can use the printer. That means you must create a scheduling system. 3D printing is not fast, and you’ll need to consider your personal bandwidth and attention. A few options include:
- Paper and pencil calendars. These are easy to use and provide quick data points. However, this system requires you to check the schedule regularly. If your staff accesses the machines, they will need to travel to your instructional space to sign up for time.
- Digital calendars. Digital calendars are quick and paperless, and provide instant feedback on the availability of your printers. You’ll need to decide whether you are comfortable creating public calendars, or if you’d rather set up the schedule yourself.
- Forms. Digital forms such as Google forms are a great way to collect requests and set up a schedule that works for you and your situation. They also provide instantaneous data for you to share with stakeholders.
Regardless of the scheduling system you choose, make sure that your stakeholders understand your processes and be consistent in using them.
Managing Prints
Finally, how are you going to manage the prints that come through? If you are in a self-contained situation and the prints are only for your students, this is probably not a major issue. But if you are serving a larger population, you’ll need to come up with a plan. You may want to block out time each day or week to dedicate to 3D printing. As your program grows, you may need to expand your time blocks. Print multiple files at once for maximum efficiency. Just keep in mind that, unless you are using a multicolor printer, all of your prints on one bed will print in the same color. You can import multiple prints into your CAD program, or adjust and resize within your slicing software.
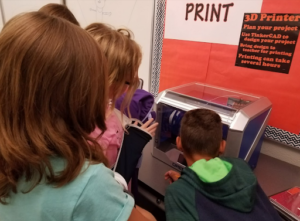
Consider giving ownership of the 3D program to your students. Train older students to load 3D prints and conduct basic maintenance of the printer. Student-friendly tasks include changing filament, removing prints, cleaning print beds, and distributing prints. When it comes to distribution, one management technique is to have each student include their initials or other identifying information on their models. This allows your student helpers to quickly identify the owner of each print. Finally, make it your students’ responsibility to pick up their prints, or assign this task to your helpers. Establish a “pick up by” date, and discard prints that have not been picked up.
“Creating a sustainable and effective 3D printing program is completely possible in your classroom setting.”
Conclusion
Creating a sustainable and effective 3D printing program is completely possible in your classroom setting. Know your why, identify your who, and design your how. Before you ever start to print, consider these questions. Also keep in mind that this is a learning process like any other. You’ll try some things that won’t work out, and that’s ok. You’ll find a groove and a system that works for you. Stay tuned for next month’s installment, Integrating 3D Printing into Your Instruction.

